Hello crafty friends! What a beautiful day we are having here in the SW of the UK, which makes a change for this part of the world! Are you all having good weather? I know that I have been remiss lately with my card making, but I have been engrossed with 'pocket letters' , which means, of course, that there is a whole raft of different supplies I need to get . . . joking!!
As we are going to be away from any form of technology from next week until the end of September, I thought that I should get at least one card made before we go. I do have my usual scheduled post ready, but that's it.
So, with out further ado, I will introduce my card. This is for the CAS Mix Up August Challenge, which calls for, stamping, sprays and your choice.
My choice is, a die cut. As always, details will be below the pics.
I don't know if this technically qualifies as 'spraying' as it was only water. I hope so.
As my Brushos have sat neglected since I bought them and tried them out the once, I thought I would get them out and have a play.
First, I took a piece of watercolour 'paper' and sprinkle some 'Leaf Green' and 'Turquoise' Brushos on to the piece and then sprayed with water, then I watched the magic happen. I sprinkled a bit more in places that seemed to be missed and tilted the paper around, to get the Brushos moving. Just before it was completely dry, I sprinkled a little more and sprayed sparingly with a little more water. Then I left it to dry.
I liked how the piece turned out, so I didn't want to cover it up too much, so I chose a die cut that would not obscure too much of the background. I adhered the Brusho panel flat to a slightly textured card base, adhered the die cut and stamped the sentiment with two different colour pigment inks.
Thank you so much for your visit today and especially if you have left a comment. You are all appreciated more than you know! If you have a question, please be sure I have a way to contact you so I can answer, as a lot of you are 'no-reply' bloggers, so I am unable to reply via e-mail.
Hello crafty buddies! I hope you are all well and have had a great week so far. I have been a little quiet of late, because I have been fascinated by some You Tube videos - I know, that's not different - well, no, but what I have been watching is different from the usual card making videos that I normally watch (although I have still watched them too). No, my friends, I have been fascinated by something new - to me - that is 'Pocket Letters'.
Now, one of the videos (can't remember which, I watched so many) whereby the person showed how to make mini notebooks and I fell in love with the cuteness of them. They are tiny 2.5"x 3.5" notebooks and were so easy, that I had to have a go! I made six, and I will show you them and then of course tell you how they were made.
First, I will just show you the one, close up, and then all six together.
Aren't they adorable? The person who made them on YT used patterned paper, but I wanted to 'glam them up' a bit and used glitter card. They can also be adorned with embellishments!
First, you take a piece of card-stock or patterned paper which you cut to 5"x 3.5" and fold in half (I also rounded each corner, but that part is optional).
Next, you take some copy paper and cut to 4.75"x 3.25". I used eight, which, when folded in half, gives sixteen pages (again, I rounded the corners).
Next, gather them all together neatly, with the cover on the bottom, hold all securely with a couple of paper grips and staple with two staples, one at the top and one at the bottom of the 'spine', as they aren't very thick, they will go through easily.
Remove the clips and fold, et voilà! Now decorate as required. They are ideal to keep in a handbag/purse for quick notes!
Have a wonderful weekend my friends!
Thank you so much for your visit today and especially if you have left a comment. You are all appreciated more than you know! If you have a question, please be sure I have a way to contact you so I can answer, as a lot of you are 'no-reply' bloggers, so I am unable to reply via e-mail.
Today, I have another card for the CAS Mix Up Challenge which calls for sprays.
I have used, markers on the stamp and misted it with a spray of water before stamping it. Then I used the sentiment stamp in the normal way, by inking and stamping without spraying and finally, my choice was, splatters. I put some of the ink directly on to my craft mat, sprayed some shimmer spray on to it to make a small puddle and then flicked the card front with my paint brush.
The beauty of it was I had enough of a puddle to use a 'mop up' piece of watercolour card-stock for a background which I will keep in my 'stash' to be used another time.
This is the finished card.
Thank you so much for your visit today and especially if you have left a comment. You are all appreciated more than you know! If you have a question, please be sure I have a way to contact you so I can answer, as a lot of you are 'no-reply' bloggers, so I am unable to reply via e-mail.
Hello crafty buddies! Did you miss me as much as I missed you? We have had our friends down from the other end of the country for a visit all week. They brought the sunshine with them so we had some lovely trips out and some equally lovely meals out too! The advantage of taking someone around your home area and showing them some of the places of interest, is that you see your home town and surrounding areas through new eyes and appreciate it with renewed eagerness! However, as lovely as it was, I did miss my crafting, so as soon as we said our very fond farewells, I immediately went to my craft room and made this card, just for the sake of crafting.
Thank you so much for your visit today and especially if you have left a comment. You are all appreciated more than you know! If you have a question, please be sure I have a way to contact you so I can answer, as a lot of you are 'no-reply' bloggers, so I am unable to reply via e-mail.
Hello lovely crafters. I hope your weekend has gotten off to a good start! Mine has, I have been in my craft room (attic) today, as I wanted to get a card made for the August challenge over at one of my favourite challengs CAS Mix Up where Loll, Bonnie and the team want to see, stamping, sprays and 'your choice'.
As per usual. I will post the pictures first and then, for those who wish, I will have the details below the pictures. Here it is then.
First, I knew that I wanted to try an ombre effect with my spraying, so I laid a panel on the floor on a large, wipe-clean surface and got out my spray - made with a tiny drop of Imagination Crafts 'Starlights' paint in a Mini Mister, topped up with water, and sprayed, low to the floor from the bottom, so that the spray was more concentrated there and getting progressively less towards the top.
Whilst that panel was drying, I sprayed a stencil with the same spray and then used it for the stencil mono-print technique - using the sprayed stencil like a stamp on to the white card base.
When both were dry, I cut a scalloped rectangle a bit larger than my focal panel out of vellum and adhered that directly to the card base, then mounted the sprayed panel on top of that with craft foam.
I finished it off with some heat embossed butterflies that I had cut out individually from a large, Memory Box stamp called, 'Flutterings'. I had seen other people do the same thing and Loll herself has done it before and I loved the idea!
Finally, I cut the greeting out of some foiled packaging that almost matched the embossing, and that was it my friends! Job done!
Thank you so much for your visit today and especially if you have left a comment. You are all appreciated more than you know! If you have a question, please be sure I have a way to contact you so I can answer, as a lot of you are 'no-reply' bloggers, so I am unable to reply to you via e-mail.
Hi fellow crafters! I hope the start to the weekend finds you all well and happy.
Today, I have a card that I made up with a panel that I stamped at my Wednesday evening crafting group, with my new found friends.
The first week that I went, Linda was kind enough to pick me up and take me there. This week, when she offered again, I said I would be brave and make my own way there, I don't like taking advantage of other people's kindness - I say brave, because I have a blindness where directions are concerned - I'm the person, who, doesn't lose her car in a car park, she . . . loses the car park itself (yes my friends, I have done that!)
Anyway, despite the very helpful (and may I say, patient lady on Google Maps), I got hopelessly lost! Three times, I think, but I lost count! Despite my stupidity, the Google Maps lady - I am now on first name terms with her, she tells me she's called Gloria - kept calmly re-calculating my route and got me there in the end!
The evening was a giggle, the ladies warm and welcoming again and Moya (the hostess) was as gracious and lovely as the first time. Despite my shyness with groups of new people, I am gradually coming out of my shell and hopefully, my shyness won't be interpreted as 'standoffishness', but I don't think so because they are all so lovely and very sweet!
Anywho, I wasn't overjoyed by my stamped panel, because, I'm not good at flower arranging (real or virtual), but I think I redeemed it a bit by 'gussying' it up with some foil accents. See what you think. If anyone has any tips on flower arrangements, I'd be so happy if you shared them in the comments.
Here are the pictures.
For those of you who like to know the process. Here goes.
First, I took a plain white panel - I usually cut some in advance, usually the same size as a standard card, that way, I can either have them full on a card base or cut them down to the size I want.
Next, I used my stamp positioner and stamped the sentiment, as I wanted the flowers around the sentiment. Then I stamped the flowers and leaves. I brought the panel home and today, I cut two strips off the sides and cut around the flowers on the left hand side as I wanted some to hang over the edge.
Then, I adhered two strips of black and white patterned paper down the sides and mounted the front panel to the card base with craft foam.
I 'gussied' it up with some WOS, some gold foil (using my Quickie glue pen) and some matching sequins. That's it my friends. Have a truly lovely weekend.
Thank you so much for your visit today and especially if you have left a comment. You are all appreciated more than you know!
Hello my lovely friends! I do hope this finds you well and having a great week! Today, I have a card for one of my favourite challenges that I have woefully neglected for quite some time . . . you all know what life can be, don't you . . . it just gets in the way sometimes!
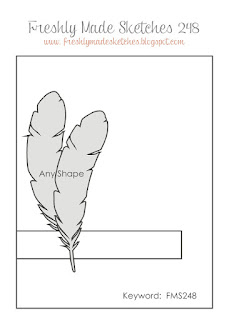
Anywho, when I saw this sketch over on the Freshly Made Sketches challenge blog . . .
. . . everything just fell into place. I already had the front panel with the score lines, to represent the horizontal of the strip in the sketch and the 'faux metal' leaves from a video I had followed on You Tube - I've just looked for it, to link it, and do you know, I can't find it anywhere? I will tell you how it was done after the pictures, as usual. Here you go.
First I made a plain white card base and adhered the panel with the hand-scored lines and mounted it to the front of the card base with a piece of craft foam - that was a mistake, I will explain later - then, I mounted the leaves, the first one flat to the card and the second with clear foam tape.
Next, I stamped the sentiment in Versamark and heat embossed it with copper embossing powder . . . yep! that's right, you saw it back there didn't you? That was my mistake, I should have done that before I mounted it on to the card!! Well hindsight is always 20/20 isn't it? The panel - predictably - warped! I cussed a little, I don't mind admitting, at my own stupidity and shoved it under a heavy book.
When I came back to it, it was much improved, and I finished it off with a few of my dew drops. I don't think it is too noticeable now - thankfully - and, hopefully, I'll remember to think it through completely before I start, but I was excited to see the end result.
Now, back to the faux metal leaves. I took some white, layering card-stock and crumpled it up into a ball. Then I flattened it out again with my hands, so the wrinkles stayed in it.
Then, I covered them with Versamark and sprinkled some copper and some gold EP's in patches and heat set. Then I repeated the process for a second layer - you can do this as many times as you want, the more the layers, the smoother the finish - and that was done.
Thank you so much for your visit today and especially if you have left a comment. You are all appreciated more than you know!
Hi all you lovely people. August is here, all too quickly again, so it's time for another challenge over at Happy Little Stampers CAS and this time the challenge is to Mask A Scene . . . no groaning in the back there, I heard you, I also felt like groaning until I tried it! Turns out it is easier than you think and it's a whole heap of fun too! Added to that the kudos of everyone who doesn't know how easy it is thinking that you are a genius!! If you pop on over there, you will see my fellow team members samples and some very helpful videos to help you with this.
Also, don't forget there are added incentives with prizes from HLS who are sponsoring this challenge.
Without further ado, here is the card and I will post instructions and supplies below.
First I took a plain, white card base - I forgot to say, this is actually a OLC - and I masked of a strip with masking tape (low tack, also placed on my arm a few times to remove even more of the stickiness). Next, I punched a circle out of masking paper and adhered it where I wanted my sun to be.
Then I took Distress Ink in Scattered Straw and a jumbo dauber (I find those easier to use than the blending tools, but that is just me) and sponged very lightly around the circle mask, for the sun.
Next, I took some Distress Ink in Tumbled Glass and lightly sponged an area above and below the sun. The final piece of sponging was the ground area, which I did in DI Gathered Twigs.
The final touch to the scene was to stamp my images. I used Versafine Black Onyx ink for that and stamped some grasses and birds from the Penny Black Natures Friends stamp set with a first generation and second generation stamping and also some grasses from the Stampin' Up Wetlands set.
When I had finished creating my little scene, I carefully removed the masking tape and stamped my sentiment, also from, the Stampin' Up Wetlands set.
There you have it, a very simple, one layer card that will make everyone think you are an artist! You can also, mask off images and stamp over them to build up a scene too! So, come and join in the fun and let us see what you have come up with . . . I can't wait to see them! Have a crafty day! Hazel xx