

Hello my lovely friends! I do hope this finds you well and having a great week! Today, I have a card for one of my favourite challenges that I have woefully neglected for quite some time . . . you all know what life can be, don't you . . . it just gets in the way sometimes!
Anywho, when I saw this sketch over on the Freshly Made Sketches challenge blog . . .
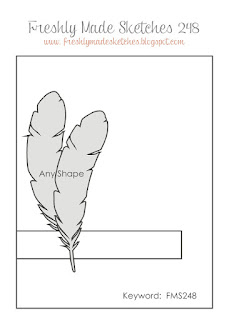


First I made a plain white card base and adhered the panel with the hand-scored lines and mounted it to the front of the card base with a piece of craft foam - that was a mistake, I will explain later - then, I mounted the leaves, the first one flat to the card and the second with clear foam tape.
Next, I stamped the sentiment in Versamark and heat embossed it with copper embossing powder . . . yep! that's right, you saw it back there didn't you? That was my mistake, I should have done that before I mounted it on to the card!! Well hindsight is always 20/20 isn't it? The panel - predictably - warped! I cussed a little, I don't mind admitting, at my own stupidity and shoved it under a heavy book.
When I came back to it, it was much improved, and I finished it off with a few of my dew drops. I don't think it is too noticeable now - thankfully - and, hopefully, I'll remember to think it through completely before I start, but I was excited to see the end result.
Now, back to the faux metal leaves. I took some white, layering card-stock and crumpled it up into a ball. Then I flattened it out again with my hands, so the wrinkles stayed in it.
Then, I covered them with Versamark and sprinkled some copper and some gold EP's in patches and heat set. Then I repeated the process for a second layer - you can do this as many times as you want, the more the layers, the smoother the finish - and that was done.
Thank you so much for your visit today and especially if you have left a comment. You are all appreciated more than you know!

Oh wow, this is gorgeous, Hazel!! I love the look of the leaves!! I'm bookmarking this post so I can try that!! They look amazing!! You can't tell at all that the sentiment warped the paper so you fixed it perfectly!! This is stunning my friend!! Have a great day!! Big hugs :)
ReplyDeleteLisa
A Mermaid's Crafts
Very beautiful! I am so glad you were able to try the Faux gold leaf technique. I thought of using the same thing when I saw the sketch (but honestly, I am not sure I will have time to make a card for it anyhow). I like the score lines on the bottom of the card and the lines in your leaf. Was that from the die? Lovely job!
ReplyDeleteWhat an elegant card Hazel and love the faux metal leaves and the series of embossed lines. Thanks for explaining how to do the faux metal technique too. x
ReplyDeletewow..those faux metal leaves look Awesome I thought them to be foil !
ReplyDeleteMistakes..I do it often ,I went a step ahead of you and ironed the cardstock from backside loosing all the embossing !!
I love learning new techniques from your blog posts. Those leaves are gorgeous and yes thought they where foiled or alcohol inks. Another fabulous clean card with another fabulous technique x Thank you for sharing and I can relate to the mini mistake at the beginning too lol x
ReplyDeleteWowza - those leaves are gorgeous! Whay a beautiful technique! And they look fabulous against the crisp white! Thanks for joining us at FMS!
ReplyDeleteGorgeous design Hazel. LOVE those faux metal leaves ... so beautiful. I will have to try this technique. xx
ReplyDeleteClever you, Hazel... and welcome to my world of Back To Front Cardmaking! If you find a way to get hindsight before you start crafting can you package some up and sent it over to me?
ReplyDeleteSuch a lovely card. You rock using score lines for maximum impact. X
Gorgeous leaves! Beautiful card~
ReplyDeleteHindsight certainly is wonderful, but without mistakes we'd never learn how to adapt LOL I love your clean and simple cards which always look so elegant dear friend x
ReplyDeleteOMGosh Hazel, this is so mega-mega gorgeous. I just loooooooove the leaves.
ReplyDeleteAce card my friend. Hugs Veerle x
So beautiful...love your gorgeous leaves, simply stunning!
ReplyDeleteLOL, I do things backwards a lot, Hazel! But this time it turned out fine! I love those Faux Metal leaves! Thanks for sharing how to do them. I thought they were heated copper! Gorgeous card!
ReplyDeleteA spectacular CAS card, Hazel! I also think that the leaves look like made out of heated copper! Stunning!
ReplyDeleteThis is such a beautiful card, Hazel! No matter whether you achieved it going frontwards or backwards, it's amazing!
ReplyDeleteThis card is so beautiful! I love those leaves! They are just gorgeous! Such rich colours! Thanks for joining us this week at Freshly Made Sketches!
ReplyDeleteWow,this is gorgeous! Yes, heating the fun foam comes in handy when you want to shrink it a bit, but don't if you want it to stay as it is. We can learn lots through our mistakes.....I learn lots:)
ReplyDeleteI love the process of how you made the leaves,I will have to give it a try . Hope you enjoy your weekend. Hazel!
I love this card Hazel!! I also lovey our take on the sketch, which is a fabulous one. I love the embossed lines, they work well for the layer on the sketch. No, I didn't know what your mistake was when you said about it. It wasn't until I read farther that I realized what happened. Honestly Hazel, had you not told us (and even still) we would not have known that you had warped your panel. The book did the trick and there is no sight of warping!!! Love, love, love those leaves. At first I thought they were copper leaves, but then when I read how you did them, I had to go back and look more closely at them. They look just like copper heated leaves! This is just a beautiful CAS card my friend. Hugs, Brenda
ReplyDeleteFab card Hazel,mistakes or not it looks amazing!just love the shiny leaves and super embossing here too ;) Viv xx
ReplyDeleteA beautiful CAS card Hazel and I love your leaves. Barbxx
ReplyDeleteI thought those leaves were made of gold foil! Thanks for the instructions - they certainly seem simple enough and the end result is quite beautiful. And I feel your pain about the warping card stock. I wish there was a way to ensure that doesn't happen. I usually try and use copious amounts of adhesive and even then, the warping still shows a bit. Your card is beautiful and I'm so glad you found some time to join us at Freshly Made Sketches.
ReplyDelete