Those of you who follow this blog closely will know that I am away right now, without internet, so this has been scheduled in advance. For the
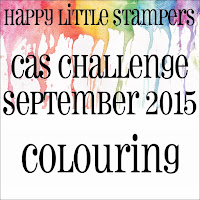
September Happy Little Stampers CAS Challenge, the challenge is for colouring.
To give you all a wonderful incentive,
Happy Little Stampers are sponsoring this challenge and the lucky winner will receive this terrific stamp set!
Now, I know that some of you lovelies are out there groaning, "Oh no, not colouring, I hate colouring". I'm here to show you that it needn't be difficult and, in fact, when you start and get into it a bit, it is actually quite fun and relaxing! I will also show you that you needn't be an expert . . . I, am certainly far from it!
I have used one stamp set, Altenew's 'Persian Motifs', and coloured it in three different ways . . . let me know which you prefer at the end. Be warned, this is going to be a long, long post!
The first, what I call, is the 'loosely goosey' technique, which is loose, wild, abandoned and unstructured and this is what it looks like, I will describe the process below.
First I stamped the image onto to watercolour paper in Versamark and scribbled some colour straight on to the images, with Kuretake Sai waterbrush markers (I couldn't afford the Zig Real Brush Pens) and spritzed generously with water and just let the colours mix and blend the way that they wanted to - hence, the 'loosey, goosey' technique - I did mop up some areas where there was too much colour gathering, but that is all I did in the way of control!
The next technique was a little more controlled, but again, not a lot, and this is what that looks like. Again I will explain the process below.
This time, I started off the same way by embossing the image onto watercolour cardstock, but this time I controlled the ink a little more by just laying a little of the colour near the base of the petals and drawing it out with water on a clean paintbrush, so that it faded out towards the tips of the petals and did the same with the leaves. I finished the whole thing off by giving the background a very light wash of colour.
The final method I used was completely different. This is more controlled and uses coloured pencils. Again, the method will be described below the photos.
First, I stamped the image in black, I used Versafine Black Onyx, but it doesn't matter what you use as this is a 'dry' method. I used Caran d'Ache Soft Colour Pencils and just applied them with a very light touch with varying shades of blue in layers until I had the colour depth that I wanted, I do not use blending solution because if you build the layers up gently and not lay all your colour down at the start, you are able to blend without solution and control it better. I did the same with various shades of green for the leaves.
Now, this is where I lost control and my black gel pen took over. I decided, in my wisdom, to put a 'few' dots of black to fill in some gaps. I started with little groups of three and then my gel pen thought, "hey, this looks fun, I want a go" and took over running about all over the place putting far too many down and spoilt the whole thing . . . well, I was horrified, but I had spent hours on the piece, so I decided I had to just run with it, so please excuse it and look beyond the dots and pretend they aren't there . . . next time, I won't allow the little devil anywhere near a piece that has taken me hours to complete!
Well, if you have stayed with me up until here, I applaud your endurance and thank you from the bottom of my heart. Don't forget to let me know which method you like best and give it a go and join us for some fun at Happy Little Stampers! Have a lovely day my friends! Hazel xx


