Showing posts with label technique. Show all posts

Wednesday, 2 November 2016

Happy Little Stampers CAS Challenge - November


Hello lovely crafters!  November already?  Where does the time go?  It's time for another challenge over on the Happy Little Stampers CAS Challenge blog and this time we want you to use 'Faux Metal' techniques.  If you aren't sure what they are, there are a number of video tutorials linked over at the challenge, so you can just pick one and follow along with it, but don't forget to link back to the challenge for a chance to win a prize!  As usual Happy Little Stampers are sponsoring the challenge!
http://happylittlestampers.blogspot.com/2016/11/hls-november-cas-challenge.html
Here are the pictures of my card and below the pictures will be the method I used.


For the card base I used watercolour card and used my Simon Says Stamp 'Air Vent' die for the border and cut a strip of gold, pearlised card to place beneath to peep through the slots.  I mounted that on to the card base, with a thin strip above and below to give a little margin.

To create the 'faux metal' leaf, I took a piece of plain white card-stock and crumpled it up in my hand.  Then I flattened it out with my fingers and die cut a leaf with my Stampin' Up 'Leaflets Framelits'.

Next, I covered the whole leaf in Versamark and sprinkled on some copper embossing powder in places and then some gold, in the areas without the copper and heat set it.  I repeated the process for a second layer, so the coating was thicker and looked more like metal.  I then tied a piece of gold twine around the base and adhered it to my card front with thin, foam tape.

I finished the card, by cutting a gold foil sentiment and adhered that flat to the card.

I do hope that you join us and give this fantastic technique a try, it is so much fun!

I can't wait to see what you all come up with!

Thank you so much for your visit today and especially if you have left a comment.  You are all appreciated more than you know!


Sunday, 2 October 2016

Happy Little Stampers CAS Challenge - Embossing On Vellum


Hello my lovelies, how are you doing today, I hope this finds you well.  Another month has whizzed by and that means another new challenge on the Happy Little Stampers CAS blog, where we want to see, embossing on vellum.


Happy Little Stampers CAS Challenge - Embossing On Vellum

As ever, Happy Little Stampers are sponsoring the challenge, so there are prizes to be won!  There are a number of techniques you can use for this challenge and you will find tutorial videos linked over at the challenge for ideas and tips.  Also, check out the rest of the talented design team for even more inspiration!

First, I will show you my card and then explain my process after the pictures - that way, you can leave as soon as you have looked at my card if you are in a hurry!  Here it is,


This was a tricky one to photograph, it leans more towards the pink side, than the blue (as it appears here) but I have got it as close as possible - the reflection off the Glossy Accents didn't help much ... but I digress!

I took a plain, white card base and made a top fold.  Next, I took a water-coloured panel, made with the 'smooshing' technique and die cut a stitched edge panel, slightly smaller than my card base, and adhered it down with tape runner.

Next, I took a piece of vellum and stamped the Kaisercraft 'Birthday' sentiment with Versamark on to a piece of vellum and heat embossed it.

**Tips**

Make sure your heat gun is really hot before applying it to the vellum and start from the back.  Work quickly and don't hold the gun too close, that way you will minimise any warping.

If your vellum has warped, place it between two cutting plates and run through your cutting machine, or place under a heavy book for a while. 

Now, I don't know if you have worked with vellum, but, if you have, you will know what a pain it is to adhere.  I have tried every trick in the book, and none have been successful . . . until now.  The trick I used, was to use, 'Stick It' double sided sticky sheets (it's thin enough, that you can still see through the vellum!)


Thank you so much for your visit today and especially if you have left a comment.  You are all appreciated more than you know!


Tuesday, 23 August 2016

CAS Mix Up - August Challenge


Hello crafty friends!  What a beautiful day we are having here in the SW of the UK, which makes a change for this part of the world!  Are you all having good weather?  I know that I have been remiss lately with my card making, but I have been engrossed with 'pocket letters' , which means, of course, that there is a whole raft of different supplies I need to get . . . joking!!

As we are going to be away from any form of technology from next week until the end of September, I thought that I should get at least one card made before we go.  I do have my usual scheduled post ready, but that's it.  

So, with out further ado, I will introduce my card.  This is for the CAS Mix Up August Challenge, which calls for, stamping, sprays and your choice.

http://casmixup.blogspot.co.uk/2016/08/cas-mix-up-august-reminder.html

My choice is, a die cut.  As always, details will be below the pics.


I don't know if this technically qualifies as 'spraying' as it was only water.  I hope so. 

As my Brushos have sat neglected since I bought them and tried them out the once, I thought I would get them out and have a play.

First, I took a piece of watercolour 'paper' and sprinkle some 'Leaf Green' and 'Turquoise' Brushos on to the piece and then sprayed with water, then I watched the magic happen.  I sprinkled a bit more in places that seemed to be missed and tilted the paper around, to get the Brushos moving.  Just before it was completely dry, I sprinkled a little more and sprayed sparingly with a little more water.  Then I left it to dry.

I liked how the piece turned out, so I didn't want to cover it up too much, so I chose a die cut that would not obscure too much of the background.  I adhered the Brusho panel flat to a slightly textured card base, adhered the die cut and stamped the sentiment with two different colour pigment inks.

Thank you so much for your visit today and especially if you have left a comment.  You are all appreciated more than you know! If you have a question, please be sure I have a way to contact you so I can answer, as a lot of you are 'no-reply' bloggers, so I am unable to reply via e-mail.


Saturday, 6 August 2016

CAS Mix Up CAS Challenge - August


Hello lovely crafters.  I hope your weekend has gotten off to a good start!  Mine has, I have been in my craft room (attic) today, as I wanted to get a card made for the August challenge over at one of my favourite challengs CAS Mix Up  where Loll, Bonnie and the team want to see, stamping, sprays and 'your choice'.

http://casmixup.blogspot.co.uk/2016/08/cas-mix-up-august-challenge.html

As per usual.  I will post the pictures first and then, for those who wish, I will have the details below the pictures.  Here it is then.


First, I knew that I wanted to try an ombre effect with my spraying, so I laid a panel on the floor on a large, wipe-clean surface and got out my spray - made with a tiny drop of Imagination Crafts 'Starlights' paint in a Mini Mister, topped up with water, and sprayed, low to the floor from the bottom, so that the spray was more concentrated there and getting progressively less towards the top.

Whilst that panel was drying, I sprayed a stencil with the same spray and then used it for the stencil mono-print technique - using the sprayed stencil like a stamp on to the white card base.

When both were dry, I cut a scalloped rectangle a bit larger than my focal panel out of vellum and adhered that directly to the card base, then mounted the sprayed panel on top of that with craft foam.

I finished it off with some heat embossed butterflies that I had cut out individually from a large, Memory Box stamp called, 'Flutterings'.  I had seen other people do the same thing and Loll herself has done it before and I loved the idea!

Finally, I cut the greeting out of some foiled packaging that almost matched the embossing, and that was it my friends!  Job done!

Thank you so much for your visit today and especially if you have left a comment.  You are all appreciated more than you know! If you have a question, please be sure I have a way to contact you so I can answer, as a lot of you are 'no-reply' bloggers, so I am unable to reply to you via e-mail.


Thursday, 4 August 2016

Freshly Made Sketches #248


Hello my lovely friends!  I do hope this finds you well and having a great week!  Today, I have a card for one of my favourite challenges that I have woefully neglected for quite some time . . . you all know what life can be, don't you . . . it just gets in the way sometimes!

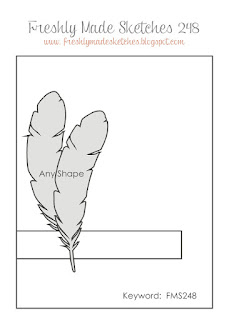
Anywho,  when I saw this sketch over on the Freshly Made Sketches challenge blog . . . 


http://freshlymadesketches.blogspot.co.uk/2016/08/freshly-made-sketches-248-sketch-by.html
. . . everything just fell into place.  I already had the front panel with the score lines, to represent the horizontal of the strip in the sketch and the 'faux metal' leaves from a video I had followed on You Tube - I've just looked for it, to link it, and do you know, I can't find it anywhere?  I will tell you how it was done after the pictures, as usual.  Here you go.


First I made a plain white card base and adhered the panel with the hand-scored lines and mounted it to the front of the card base with a piece of craft foam - that was a mistake, I will explain later - then, I mounted the leaves, the first one flat to the card and the second with clear foam tape.

Next, I stamped the sentiment in Versamark and heat embossed it with copper embossing powder . . . yep!  that's right, you saw it back there didn't you?  That was my mistake, I should have done that before I mounted it on to the card!!  Well hindsight is always 20/20 isn't it?  The panel - predictably - warped!   I cussed a little, I don't mind admitting, at my own stupidity and shoved it under a heavy book.

When I came back to it, it was much improved, and I finished it off with a few of my dew drops.  I don't think it is too noticeable now - thankfully - and, hopefully, I'll remember to think it through completely before I start, but I was excited to see the end result.

Now, back to the faux metal leaves.  I took some white, layering card-stock and crumpled it up into a ball.  Then I flattened it out again with my hands, so the wrinkles stayed in it.

Then, I covered them with Versamark and sprinkled some copper and some gold EP's in patches and heat set.  Then I repeated the process for a second layer - you can do this as many times as you want, the more the layers, the smoother the finish - and that was done.

Thank you so much for your visit today and especially if you have left a comment.  You are all appreciated more than you know!


Monday, 16 May 2016

Sunday's Background Piece


Hello my lovelies!  As you know, yesterday was another of my funday's and I made a couple of backgrounds from some techniques I had been trying out!

This is a card I made from one of them.


I used three different shades of ink for the sentiment, picking out some of the colours used in the background piece, so that it coordinated with the focal panel.  Then I punched some circles from the glitter paper that I used to border the panel and covered them with Glossy Accents to make matching 'enamel dots'.
  
So that's what became of one of them!  I hope you all had a lovely weekend!  Have a wonderful week!

Thank you so much for your visit today and especially if you have left a comment.  You are all appreciated more than you know!


Sunday, 15 May 2016

Funday Sunday - Technique Tryout

Well, as you know my lovelies, Sundays are my fundays, and today I decided to try out a technique I have seen often, but never tried!  The layered embossing technique!  However, it wasn't successful for me, because I am far too impatient, plus, I forgot one vital stage . . . I will explain.  First, I will show you the piece.


Those of you who have tried this technique and been successful will probably see where I messed up.  The first layer of leaves were OK, but when I did the second layer I forgot to go over the background again with another layer of Distress Ink, before heat embossing the third layer, resulting in far too many images of the same colour!

The next big mistake, was being far too impatient and not drying the next layer of Distress Ink thoroughly enough, which resulted in a mess around some of the images, if you look closely, you will see about four different patches where the clear embossing powder clung to areas that weren't quite thoroughly dry.  As I'd already made a mess of it in this way, I decided to distress it even more by sprinkling some water droplets on it and mopped them off with some tissue, turning it into more of a 'shabby chic' piece.

I will give this another go one day and try and get it right next time!  Then, I sprayed water on my craft mat to wipe up the ink, but instead of grabbing the old towel I keep for mopping up, I decided to grab a piece of water-colour card instead and mop up with that.  This is my 'mop up' piece.


I think the 'mop up' piece was the better piece of the two in the end!  ;)

Here they are, side by side.


What did you get up to today?  I hope it was fun!
 
Thank you so much for your visit today and especially if you have left a comment.  You are all appreciated more than you know!


Monday, 11 April 2016

Dauber Colouring & Upcycling


Today is a picture heavy post, so grab yourself a cuppa and a biscuit!  First up is a card made with the 'Botanical Garden' stamp set by Altenew.  I have had this set for a couple few weeks now and it hasn't seen ink in all that time and as I just had to have it at the time (much like everything else I buy), I thought I really ought to use it.

I had an idea that I wanted to try the 'dauber colouring' technique that I have seen a few times on You Tube, as it is a nice quick and easy colouring method that can look quite effective.  So, first off I stamped my images on to a white panel and stamped some of them again on to scrap pieces of white card-stock, because I wanted to layer some of them.

The next thing was to choose my inks.  I chose some soft colours by Memento.  Then I coloured the images very loosely (not even trying to stay inside the lines, as that is not the look I was going for)  all over the flowers, using some slightly darker colours for the centres and fading off more towards the edges.  I wanted to leave some of the images white, so I decided to leave the the leaves uncoloured. 

Then I 'fussy cut' some of the layers from the extra images that I had stamped and coloured, and layered them up on top of the images on the main panel with foam tape for dimension.  I felt that as the colouring was unstructured, it needed that bit of dimension from the layering of the images.

Now, this is where the 'upcycling' comes in.  I had just opened an embossing folder from Taylored Expessions and I liked the soft, apricot/peachy striped packaging so before throwing it away I cut some strips from it and used a couple down the sides of my card base, with more on one side than the other.  Then I mounted the focal panel on to the card base and finished it with three , glittery home made dew drops.  This is my first card (stay tuned, there is a second one after this).


I did all my stamping with my home made stamping tool, here,


It's really a cheap MDF photo frame with a sheet of perspex for the lid and a magnetic sheet in the bottom (it may be crude, but it's effective)

I still had some pieces of the Taylored Expressions packaging left and a card base that I had used the 'stencil monoprint' technique on and decided not to use, so I just grabbed it, stamped a sentiment and stuck a strip across the bottom and the last strip on inside bottom border and tied in the brown sentiment with a thin strip of brown card-stock (although it looks more like black in the photo, but it is brown, I swear) between the patterned piece and the white card base to tie in the brown sentiment.  Again, finishing with three more of the home made 'dew drops'.  Here it is.


If you are still with me I applaud your staying power and thank you all very much indeed for your visits.  I hope it was worth it!  Have a wonderful week my friends, until the next time!  

** Edit **

People have been asking me how I made the 'dew drops', I did put the answer in reply to a comment, but for those of you who don't have the time to read other people's comments (who does?) here are the basics.

I used WOW ‘Melt It Powder’.  It’s from the makers of WOW embossing powders.  You just put it into a foil case (a foil baking case would do, you can buy them from WOW, but suspect they would be cheaper from the grocery store) and you just put your powder in it (whatever amount you want, so there is no measuring involved), then you hold it with a peg/tweezers, anything to protect your fingers and melt it from underneath with your heat tool (don’t do it from the top like I did or you’ll be dusting it off every surface for weeks) ;)   Then, when it’s melted you just drop drops of  it out on to your craft mat/baking sheet and allow to set.  If there are any misshapen ones, just pop them back in the foil container and re-melt it.  It melts very quickly.
 
I added some glitter to some of them, and some were just plain.  I’m going to experiment with colouring some with some Brusho powder too!